Headers
In this lesson, we’ll add a couple more tags to our <body> in order to display and organize our content a little better. Speaking of organization, when you examine it closely, an HTML page is a lot like an outline you used to make for your essays in high school. Let’s take a look at a sample outline:
- Pierre’s Trip Abroad
- Cleveland
- burning river
- other garbage
- New York
- people cussing at me
- skyscrapers
- Empire State Building
- Boston
- Baked Beans
- Cleveland
There are tags in HTML that let you structure your document in the same way. They’re called header tags, and they offer six levels of importance: <h1> through <h6>. So if we wanted to structure the above page in HTML, and maintain the relative hierarchies, it would look like this:
<h1>Pierre’s Trip Abroad</h1>
  <h2>Cleveland</h2>
    <h3>burning river</h3>
    <h3>other garbage</h3>
  <h2>New York</h2>
…and so on. However, header tags do not actually create an outline, with leading numbers and letters and such. They simply denote levels of importance, and by default make the text they contain bigger and bolder for emphasis. Remember, the indented spacing in the HTML above has no effect on the browser output, but is added for clarity — anything more than one space has no effect on the final page.
You may wonder why you’d want to structure your HTML this way. One reason is that it allows search engines like Google to figure out what’s important on your page. (Seriously! They look at header tags and weigh the text between them a little heavier than other text.) Also, it lets you style your important text easily when we move on to CSS. You can imagine headers creating this kind of common structure:
<h1>name of your website</h1>
<h2>name of the current page</h2>
<h3>navigation menu header</h3>
<h3>title of blog post</h3>
Time for some hands-on fun! Create a new HTML document, using the basic <html>, <head> and <body> tag structure introduced in the previous lesson. Within the <body> tag, enter some sample headers like the ones shown above. Be sure to close your header tags after each statement. When you’re finished, save your file (include the “.html” extension) and open it in your browser. Notice how the text size varies depending on the number used in your header tag, and that each header begins on a new line.
Paragraphs
So now we have header tags, and in them a great way to lay out a page’s information. Let’s actually put some content in there! The best way to insert a block of text onto a web page is to wrap it in the <p> tag, as shown below:
<p>P most likely stands for "paragraph." but there are
other words it could stand for, like pea or pee or
princess. or, how about psychology? pneumatics? i guess
it could really stand for anything.</p>
On a side note, depending on which version of HTML you use (There are versions? What? We’ll get to this much later), you may sometimes omit the closing </p> tag. Most browsers are smart enough to close the </p> tag themselves when they see a new open <p> tag later on, but you should use closing </p> tags anyway. It’s for the best.
Another hands-on experiment! Open the file you were using before in your text editor, and insert a paragraph after your headers. Be sure to wrap it in <p> and </p> tags. Save the file and open it in your browser to see the results.
Links
So now we have big text and blocks of text. What about hypertext — the HT in HTML? I’m talking about links, which of course we need on our page! Links are made with the anchor tag, or <a>. Now, stay with me here. In addition to tag names, like a, p, h1 and body, there are also tag attributes, or additional tag information that doesn’t actually show up on the page. Attributes are written inside the less-than and greater-than symbols.
For example, the <a> tag, which creates links, has an attribute called href that tells the link where to go. Here’s an example of the <a> tag in action: if you wanted to link the phrase “click here to go home” to http://www.google.com, you would format the whole <a> tag like this:
<a href="http://www.google.com">click here to go home</a>
Let’s study that a bit. The content that actually resides between the beginning and closing tags is the “click here to go home” text. So for all links, the text that you wish to represent your link goes between the <a> tags. The attribute, however, contains the actual link URL and looks like this: href="http://www.google.com". The quotes are absolutely necessary; so make sure to put the entire link in quotes. Finally, note that the attribute is completely contained within the opening <a> tag, and that there is a space between the letter a and href, so as not to confuse the browser.
Let’s do a quick review of our tags so far in this lesson. Header tags <h1> through <h6> serve to organize your page. Paragraph tags <p> allow you to insert blocks of text. Anchor tags <a href=""> insert links. If you’re confused, try inserting some of these tags (with appropriate content) into the <body> of the HTML document you created at the beginning of this lesson, and opening it in your browser. The best way to learn HTML and CSS is by doing and doing again.
Web Directories
We’re going to take a little detour from writing code and learn something about maintaining a web site. Take a look at this sample URL:
http://www.george.com/blog/july/monday.html
Let’s break it down like it was your computer. “www.george.com/” is the main server, and this is like your computer’s hard disk. “blog/” represents a directory, and this is like a folder on the root level of your hard disk. “july/” is another directory, within the “blog/” directory. Or, to keep it going, like having a folder called “july” in the folder called “blog” on your hard disk. Finally, “monday.html” is a page in the “july/” directory, just like having a file called “monday.html” in your “july” folder.
So, when you use a forward slash ( / ) in a URL, it’s saying that the file or directory to the right of the slash is contained inside the directory to the left of the slash. Again, this means that in the example above, there’s a file called “monday.html” in a “july” directory, which itself is in a “blog” directory on a server called “www.george.com”.
This is a key concept for a lot of reasons. First, when using the href attribute (or the src attribute, which we’ll get to in a little bit), you have to make sure that you’re linking to the correct destination that you want. Let’s say that the domain for your website’s server is http://www.mysite.com. Let’s also say that you have a directory on your website called blog for, well, your blog. Finally, consider that the first page you see when reading your blog is called page1.html. When you want to link to page2.html from page1.html, you do not need to write out the entire URL, because both files are in the same blog directory. So your href attribute would be href="page2.html" instead of the full href="http://www.mysite.com/directory/page2.html".
On the other hand, if it’s in a different directory or on a different server, you must use a complete URL (as in the second example above) to make sure the browser knows exactly where it’s going. Only use http:// when you include the full URL, or your browser will not know where to go, and your link (or image, as explained below) will not work.
Pictures
Without pictures, the Internet would be useless. How else would we look at cats? You better believe that you can insert pictures using HTML. The catch here is that each picture is saved in a separate file. Since it’s a picture, there’s no text to write in between two tags, so how are we going to do it?
The image tag <img> is its own beginning and end tag. Here’s a sample <img> tag to get us started:
<img src="arrow.gif" alt="Arrow" />
We’re going to go through this piece by piece. First you have the img name, nothing special there. Next you have the src attribute. This is similar to the href attribute we use for links: it tells the browser where the image file is located. In our example, the image is called “arrow.gif” and it is located in the same directory as our HTML file. (If it weren’t, we would need to provide the whole path, including the server and directories).
Next we have the alt attribute. This provides some text in case the image doesn’t load. Some people will tell you this is optional, but let’s just consider it mandatory. You’ve probably encountered a broken image before, where it’s an empty box with a red X or a blue question mark, right? The alt attribute at least gives a suggestion of what should be there. Finally, we have a lone forward slash. This little guy closes the tag all by himself, with no need for a separate </img> tag. Nice and clean.
There’s an image called “arrow.gif” along with this lecture’s downloadable materials, at the bottom of this page. Make sure you download these materials and move at least the image to the same folder as your current HTML file. Then, add the example <img> code above into your file. Save it and open it in your browser, and bask in the glow of your first web page picture. If you have other pictures laying around, make sure they’re properly formatted for the web (i.e. no spaces in their file name, and saved as a GIF or JPEG) and copy them to the same folder as your HTML file. You can then insert them into your HTML file by adding a new <img> tag and putting the picture’s filename in the src attribute.
Putting this all together
We now have some great tags at our disposal: headers, paragraphs, links, and images. On their own, they’re certainly powerful and capable of displaying a fully functional page. But what if you wanted to put a link within a paragraph of text? Or, what if you wanted an image to link somewhere? Tags can be combined, or nested, to achieve this effect. Let’s solve both of these problems right now.
Remember, the text between the <a> tags turns into clickable links that we’re all familiar with. If a section of a paragraph needs to turn into a link, simply surround it with the opening and closing <a> tags, like so:
<p>do you want an incredible machine that tones your abs and
makes milkshakes at the same time? guaranteed to help you
lose 15 pounds a week, or your money back! to order, simply
<a href="http://www.abshaker.com">click this link</a> and
have your credit card ready.</p>
That’s not so bad. There is one thing to look out for, however: I placed a space before the opening <a> tag, and a space after the closing </a> tag. This preserves the original appearance of the sentence in the paragraph. If you simply deleted the <a> tags from the example, the sentence would still be perfectly readable. Always have an idea of how you want your page to appear when you add a tag.
What about making an image link somewhere? Well, as we’ve discovered, anything that is placed between the <a> tags is turned into a link, so let’s try inserting the entire <img> tag in there!
<a href="http://www.arrows.com"><img src="arrow.gif" alt="arrow" />
</a>
Or, what if you wanted your top-level header to link somewhere? Many sites have their <h1> tag link back to their home page. To do this, you can put the whole <a> tag within the <h1> tag:
<h1><a href="http://www.mysite.com">My Site</a></h1>
Sure enough, these examples work exactly like you’d expect them to, and I encourage you to try these combinations in your HTML file. If you suddenly see a colored border around your image after you’ve made it link somewhere, don’t worry. Some browsers automatically place such a border around images to distinguish them as links. What a day, though! Look at all we’ve accomplished!
Key Concepts
- Header tags
<h1>through<h6> - Paragraph tag
<p>to place blocks of text - Anchor tag
<a>to create links- Use the
hrefattribute to point to the actual link - Web directories: servers, folders, and files
- Use the
- Image tag
<img>for displaying graphics- Use the
altattribute to provide a short description - There is no closing tag, just stick a forward slash at the end
- Use the
- Tag combinations
Homework
For this assignment, first download the lesson’s materials. Then, write an HTML page that produces output like the screenshot below. Make sure to include these extra details:
- The page’s title is “homework 2”
- The links point to Google and NASA’s websites respectively
- The arrow’s alt text is “deco”
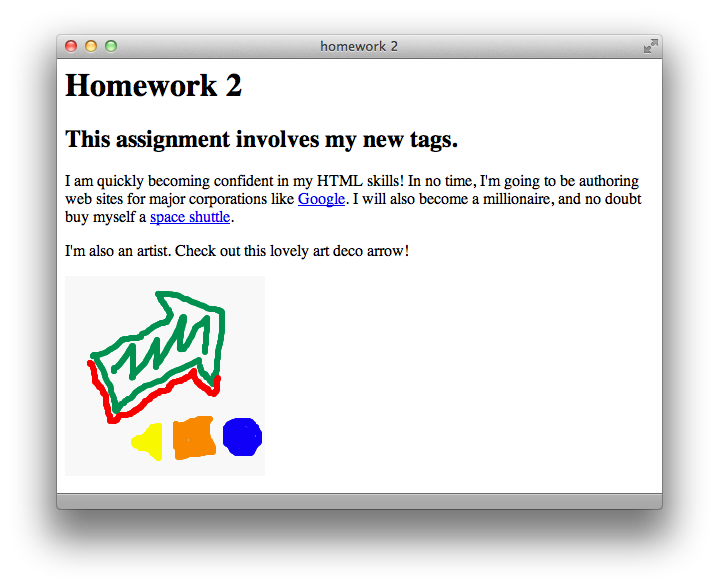
Again, that arrow picture is included with the download, and its filename is “arrow.gif”. When you’re finished, compare your HTML file to the “homework2.html” file in the Answers folder.